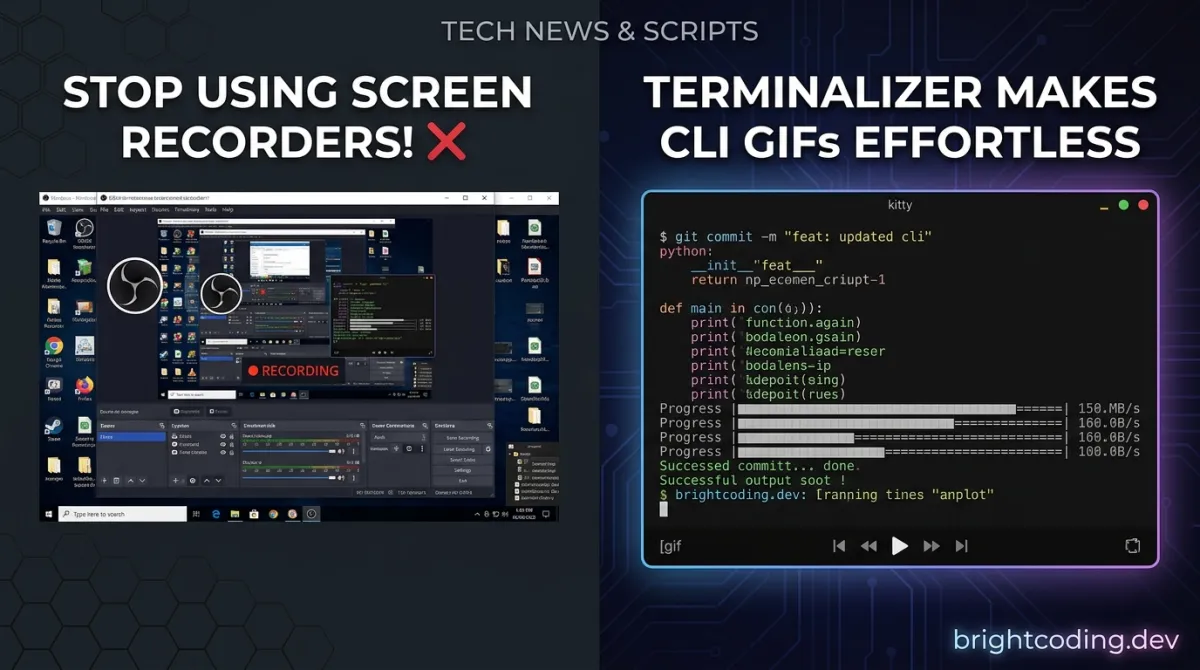
Stop Using Screen Recorders! Terminalizer Makes CLI GIFs Effortless
Stop Using Screen Recorders! Terminalizer Makes CLI GIFs Effortless
Ever tried explaining a terminal workflow to a teammate, only to end up with a 50MB screen recording that looks blurry, shows your embarrassing desktop notifications, and somehow captures your Spotify playlist in the background? We've all been there. The developer tools ecosystem is overflowing with screen capture solutions, yet none of them truly understand what makes terminal content special—monospace fonts, precise cursor movements, and the raw elegance of command-line interfaces.
What if you could transform your terminal sessions into crisp, customizable, lightweight animated GIFs without touching a traditional screen recorder? Enter Terminalizer—the open-source secret weapon that's making developers abandon bloated capture tools faster than you can type npm install. Built by Fares K. Alaboud and backed by thousands of GitHub stars, this Node.js-powered utility doesn't just record your screen; it reconstructs your terminal experience with surgical precision, giving you pixel-perfect renders with customizable themes, window frames, and even watermarks.
Ready to discover why top open-source maintainers, DevRel professionals, and technical writers are quietly switching to this tool? Let's dive deep into what makes Terminalizer the most intelligent terminal recording solution available today.
What is Terminalizer?
Terminalizer is a cross-platform command-line tool that records terminal sessions and generates animated GIF images or shareable web player links. Unlike conventional screen recorders that capture raw pixels from your display, Terminalizer operates at the terminal emulation layer—it interprets the actual text, colors, cursor positions, and terminal sequences to reconstruct your session programmatically.
Created by Fares K. Alaboud and released under the MIT license, Terminalizer has become a staple in the developer tooling landscape. The project gained significant traction after trending on GitHub, attracting contributors and users who needed a more elegant solution for creating CLI documentation, tutorial content, and social media↗ Bright Coding Blog demos.
The tool's architecture is particularly clever: it spawns a pseudoterminal (PTY), captures the input/output streams, stores the session data in a structured YAML format, then renders frames using a headless browser approach. This means your final GIF isn't a compressed video—it's a series of perfectly rendered terminal frames with selectable text quality, consistent typography, and no screen resolution dependencies.
What makes Terminalizer especially relevant now? As developer experience (DX) becomes a competitive differentiator for platforms and tools, the ability to create polished, consistent terminal demonstrations has shifted from nice-to-have to essential. Whether you're building CLI tools, documenting APIs, or teaching Git workflows, Terminalizer delivers professional-grade output that scales across documentation sites, GitHub READMEs, Twitter threads, and conference presentations.
Key Features That Set Terminalizer Apart
Terminalizer isn't merely a screen recorder with a terminal skin. Its feature set reveals deep technical sophistication:
🎨 Programmatic Rendering Engine — Instead of capturing bitmaps, Terminalizer renders each frame using HTML/CSS in a headless environment. This produces crisp text at any resolution, eliminates font rendering inconsistencies across platforms, and keeps file sizes dramatically smaller than video equivalents.
🖼️ Custom Window Frames — Choose from null (bare terminal), window (macOS-style chrome), floating (modern shadowed card), or solid (minimalist bordered) frame types. Each supports CSS customization for margins, shadows, and background colors—critical for brand consistency in commercial documentation.
🎯 Frame-Level Editing Control — The generated YAML recording files expose every frame with configurable delays. Need to pause longer on that critical command output? Edit the frameDelay values directly. Want to skip redundant frames? Use the step parameter during render to reduce output size.
🔧 Deep Customization via YAML — Control cols/rows explicitly, set custom cwd for reproducible demos, inject env variables, and configure cursor styles (block, underline, bar). The command option lets you record specific shells—zsh, fish, powershell.exe, or even single commands like ls -la.
💧 Watermark Support — Add logo watermarks with CSS-positioned transparency. Perfect for open-source projects building brand recognition or companies creating proprietary tutorial content.
🌈 Complete Theme Control — Override all 16 ANSI colors plus background, foreground, and cursor colors using hex, RGB, HSL, or named CSS values. The default palette is carefully tuned for accessibility and aesthetic appeal.
📤 Native Sharing Infrastructure — Upload recordings to terminalizer.com for web player links, or generate self-contained web players with the generate command—no external dependencies required.
Real-World Use Cases Where Terminalizer Dominates
1. Open-Source Documentation & README Demos
Nothing kills a GitHub project's credibility faster than a static screenshot of terminal output. Terminalizer GIFs auto-play in READMEs, showing living, breathing CLI interactions that load instantly without YouTube embeds or video hosting dependencies.
2. Technical Twitter/X and Social Media Content
Social platforms severely compress video. Terminalizer's optimized GIF output maintains readability at small sizes, and the stylized window frames make your content instantly recognizable in crowded feeds. The solid frame with custom branding colors? That's your visual signature.
3. CLI Tool Onboarding & Interactive Tutorials
Building the next vercel or supabase CLI? Record guided onboarding flows with precise timing control. Edit frames to emphasize critical flags, pause on error messages, and create pixel-perfect tutorial sequences that users can follow at their own pace.
4. Developer Advocacy & Conference Talks
Speaker decks benefit enormously from lightweight, loopable GIFs. Terminalizer's repeat: 0 configuration creates infinite loops for kiosk displays, while maxIdleTime prevents awkward pauses when network latency strikes during live demos.
5. Regression Testing Visualizations
Capture expected CLI behavior, render to GIF, and include in pull request descriptions. Reviewers see exact intended output without running commands locally—accelerating reviews for tools with complex terminal UIs.
Step-by-Step Installation & Setup Guide
Prerequisites
Terminalizer requires Node.js (versions 4 through 16 work smoothly; newer versions may need build tools for native C++ addons). Verify your installation:
node --version
npm --version
For Node.js v17+, install build essentials first:
# macOS
xcode-select --install

# Ubuntu/Debian
sudo apt-get install build-essential

# RHEL/CentOS/Fedora
sudo yum groupinstall 'Development Tools'
Global Installation
Install via Yarn (recommended) or npm:
# Using Yarn
yarn global add terminalizer

# Alternative: Using npm
npm install -g terminalizer
Troubleshooting permission errors? If you encounter
EACCES: permission denied, access '/usr/local/lib', fix npm's default directory ownership:sudo mkdir -p /usr/local/lib/node_modules sudo chown -R $(whoami):$(whoami) /usr/local/lib/node_modules yarn global add terminalizer
Platform-Specific Dependencies
Linux users may need additional libraries:
# Fix libXss.so.1 error (RHEL/CentOS/Fedora)
sudo yum install libXScrnSaver

# Fix libgconf-2.so.4 error (Ubuntu/Debian)
sudo apt-get install libgconf-2-4
Initialize Global Configuration
Create your global config directory for persistent defaults:
terminalizer init
This creates ~/.config/terminalizer/config.yml (Linux/macOS) or %AppData%\terminalizer\config.yml (Windows). Edit this file to set your preferred shell, theme, and default frame styling across all recordings.
Verify Installation
terminalizer --help
You should see the complete command reference with all available options and examples.
REAL Code Examples from Terminalizer
Let's examine actual usage patterns extracted directly from the Terminalizer repository documentation, with detailed explanations of each technique.
Example 1: Basic Recording Workflow
The foundational three-command workflow demonstrates Terminalizer's core philosophy: record, review, render.
# Start recording; creates demo.yml in current directory
terminalizer record demo

# Replay the recording in your terminal for verification
terminalizer play demo

# Render to animated GIF (demo.gif by default)
terminalizer render demo
What's happening under the hood? The record command spawns a PTY with your configured shell (default: bash on Linux, powershell.exe on Windows), captures all stdin/stdout/stderr with precise timestamps, and serializes to YAML. The play command reads this YAML and replays it through your current terminal—useful for verification before public sharing. Finally, render launches a headless browser, applies your CSS theme configuration, and captures each frame to assemble the GIF.
Pro tip: Always play before render. Caught typos in recordings are trivially fixed by editing the YAML—no re-recording required.
Example 2: Custom Configuration for ZSH Users
Terminalizer defaults to bash -l on Linux, which frustrates ZSH enthusiasts. Here's the exact configuration override from the official FAQ:
# Generate a local config file to customize
cd ~/my-project
terminalizer config
Edit the generated config.yml:
# Specify ZSH as the recorded shell
command: zsh

# Match your terminal's Powerline font for authentic rendering
fontFamily: "Meslo for Powerline, Meslo LG M for Powerline"

# Optional: set explicit dimensions for consistent output
cols: 80
rows: 24
Then record with your custom configuration:
terminalizer record demo -c config.yml
Critical insight: The command field accepts any executable—fish, nu, ipython, even single commands like htop or vim. This makes Terminalizer invaluable for recording specific tool interactions without manual navigation overhead.
Example 3: Advanced Frame Styling with CSS
Terminalizer's frame system transforms raw terminal captures into polished visual assets. Here's the complete configuration for a modern, shadow-free presentation style:
frameBox:
  type: solid
  title: null
  style:
    boxShadow: none
    margin: 0px
    backgroundColor: "#0d1117"  # GitHub Dark Dimmed background

# Complementary terminal styling
terminal:
  cursorStyle: block
  fontFamily: "JetBrains Mono, Fira Code"
  fontSize: 14
  lineHeight: 1.2
  letterSpacing: 0.5

theme:
  background: "#0d1117"
  foreground: "#c9d1d9"
  cursor: "#58a6ff"
  black: "#484f58"
  red: "#ff7b72"
  green: "#3fb950"
  yellow: "#d29922"
  blue: "#58a6ff"
  magenta: "#bc8cff"
  cyan: "#39c5cf"
  white: "#b1bac4"
Design rationale: The solid frame with title: null eliminates window chrome for embedded documentation contexts. Removing boxShadow and margin creates edge-to-edge terminal content that integrates seamlessly into blog posts and documentation sites. The explicit GitHub Dark theme colors ensure your GIF matches modern developer tooling aesthetics.
Example 4: Watermark Configuration for Brand Recognition
Protect and promote your content with positioned watermarks:
watermark:
  imagePath: "https://mycdn.com/logo.png"
  style:
    position: absolute
    right: 15px
    bottom: 15px
    width: 100px
    opacity: 0.9
Implementation notes: The imagePath accepts absolute local paths or HTTPS URLs. The style block uses camelCase CSS properties (not kebab-case) due to YAML parsing constraints. Adjust opacity based on your logo's contrast—subtle watermarks (0.6-0.8) work best for tutorial content, while prominent branding (0.9-1.0) suits promotional materials.
Example 5: Render Optimization for File Size
Control output quality and frame density for web-optimized delivery:
# Reduce frames by half (every 2nd frame), set 85% quality
terminalizer render demo --step 2 --quality 85 --output demo-optimized.gif
Performance impact: The --step parameter is your primary file size lever. A step of 2 typically reduces GIF size by 40-50% with minimal perceptual loss for typing animations. For extremely long recordings, combine with external compression:
# Post-process with external compressor for maximum optimization
terminalizer render demo --step 3 --quality 75
# Then upload to https://gifcompressor.com for final optimization
Advanced Usage & Best Practices
Frame Delay Manipulation for Narrative Pacing
Edit your .yml recording file directly to create dramatic pauses. Increase frameDelay values after critical command outputs to let viewers absorb information. The maxIdleTime: auto setting prevents awkward hangs when network commands stall.
Environment Variable Injection
Use the env configuration to inject secrets or API keys during recording, then strip them from the published YAML. This enables reproducible demos with live services without exposing credentials:
env:
  API_KEY: "demo_key_12345"  # Replace with real key for recording, remove after
Batch Rendering with Shell Scripts
Automate documentation updates by scripting multiple renders:
#!/bin/bash
for demo in setup deploy debug; do
  terminalizer render "$demo" --output "docs/gifs/$demo.gif" --quality 90
done
GitHub Actions Integration
Trigger Terminalizer renders in CI pipelines when CLI tools change, ensuring documentation GIFs stay synchronized with actual tool behavior.
Comparison with Alternatives
| Feature | Terminalizer | Asciinema | Screen Recording (OBS) | ttygif |
|---|---|---|---|---|
| Output Format | GIF, Web Player | SVG+JSON, Web Player | MP4, MKV, etc. | GIF |
| File Size | Small (rendered text) | Tiny (text data) | Large (video) | Medium |
| Custom Styling | Extensive (CSS themes) | Limited | N/A (raw pixels) | None |
| Window Frames | 4 built-in + CSS custom | None | N/A | None |
| Offline Playback | Yes (GIF) | Requires player | Universal | Yes |
| Editability | Frame-level YAML editing | Limited | Video editing | None |
| Text Selectability | No (GIF) | Yes (web player) | No | No |
| Cross-Platform | Yes (Node.js) | Yes | Yes | Linux/Mac only |
| Watermark Support | Built-in | No | Post-production | No |
| Self-Hosted Player | Yes (generate command) |
Yes | N/A | No |
The Verdict: Choose Terminalizer when you need polished, branded, shareable GIFs with precise visual control. Choose Asciinema when text selectability and minimal file size trump visual styling. Avoid raw screen recording for terminal content—it's overkill for the medium and produces inferior results.
FAQ: Common Developer Concerns
Q: Does Terminalizer work with my custom ZSH theme and Powerline fonts?
A: Absolutely. Override the command to zsh and specify your fontFamily in config. The rendering engine supports any system-installed font.
Q: Why does installation fail on Node.js 18+?
A: Native C++ addons may need rebuilding. Install node-gyp build tools for your platform, or use Node Version Manager (nvm) to temporarily switch to Node 16.
Q: Can I record interactive programs like vim or htop?
A: Yes! Set command: vim or command: htop directly. Terminalizer captures full TUI interactions, though complex mouse events may have limited fidelity.
Q: How do I remove sensitive commands from a recording?
A: Edit the generated .yml file directly—it's human-readable. Delete or modify specific frames before rendering. Never commit raw .yml files containing secrets.
Q: Is the web player hosting free and permanent?
A: The terminalizer.com sharing service hosts recordings; longevity depends on the service's continued operation. For permanent hosting, use terminalizer generate to create self-contained web players for your own infrastructure.
Q: Can I automate Terminalizer in CI/CD pipelines? A: Yes, though headless environments need Xvfb (Linux) or equivalent display servers. Docker↗ Bright Coding Blog images with pre-installed dependencies work well for GitHub Actions.
Q: What's the maximum recording length? A: There's no hard limit, but practical constraints apply. Long recordings produce large YAML files and slow renders. For sessions exceeding 5 minutes, consider segmenting into focused demonstrations.
Conclusion: Elevate Your CLI Storytelling Today
Terminalizer represents a fundamental paradigm shift in how developers capture and share terminal interactions. By abandoning bitmap-based screen recording for programmatic terminal emulation, it delivers unmatched visual quality, granular control, and file efficiency. The YAML-based editing workflow transforms post-production from video editing torture into simple configuration management.
Whether you're documenting APIs, building CLI tools, or crafting the perfect Twitter demo, Terminalizer eliminates the friction between your terminal mastery and your audience's understanding. The customizable themes, frame styles, and watermark capabilities mean your content doesn't just inform—it reinforces your brand identity with every loop.
The open-source community has spoken: with thousands of stars and consistent GitHub trending appearances, Terminalizer has earned its place in the modern developer's toolkit. Don't let another README languish with static screenshots. Don't subject your followers to bloated video uploads.
Your terminal deserves better. Your audience deserves better.
👉 Star Terminalizer on GitHub — install it today, record your first demo, and discover why developers are abandoning screen recorders for good. The yarn global add terminalizer command takes thirty seconds. The professional polish it adds to your technical content? That lasts forever.
Built to be jusT cOol 👌🦄 — and it absolutely delivers.
Outils recommandés
Explore on the BrightCoding network
Hand-picked resources from our other sites.
Stop Losing Context! cmux Is the Terminal AI Agents Actually Need
cmux is a free, open-source Ghostty-based macOS terminal with vertical tabs, smart notifications for AI coding agents, and an integrated scriptable browser. Sto...
Stop Wasting Money on LLM Calls! Pezzo Cuts Costs by 90%
Discover how Pezzo, the open-source LLMOps platform, helps developers slash AI costs by 90% through intelligent prompt management, semantic caching, and real-ti...
buildermethods/design-os: Close the Gap Between Product Vision and Code
buildermethods/design-os is an MIT-licensed TypeScript tool that bridges product planning and implementation through a guided AI conversation workflow, exportin...
Continuez votre lecture
The Ultimate Guide to Self-Hosted Workflow Automation Executors: Take Control of Your Automation Empire

AI Research Assistant: How Real-Time Web Scraping is Revolutionizing Knowledge Work in 2025

🎮 The Ultimate Guide to Open Source JavaScript Games: 100+ Free Games & Dev Tools You Can Use Today

Stop Coding Alone: OPC-Skills Gives Your AI Agent Superpowers
Commentaires 0
Aucun commentaire pour l'instant. Soyez le premier à réagir !