Stop Wrestling with macOS Settings Windows! Use SettingsKit Instead
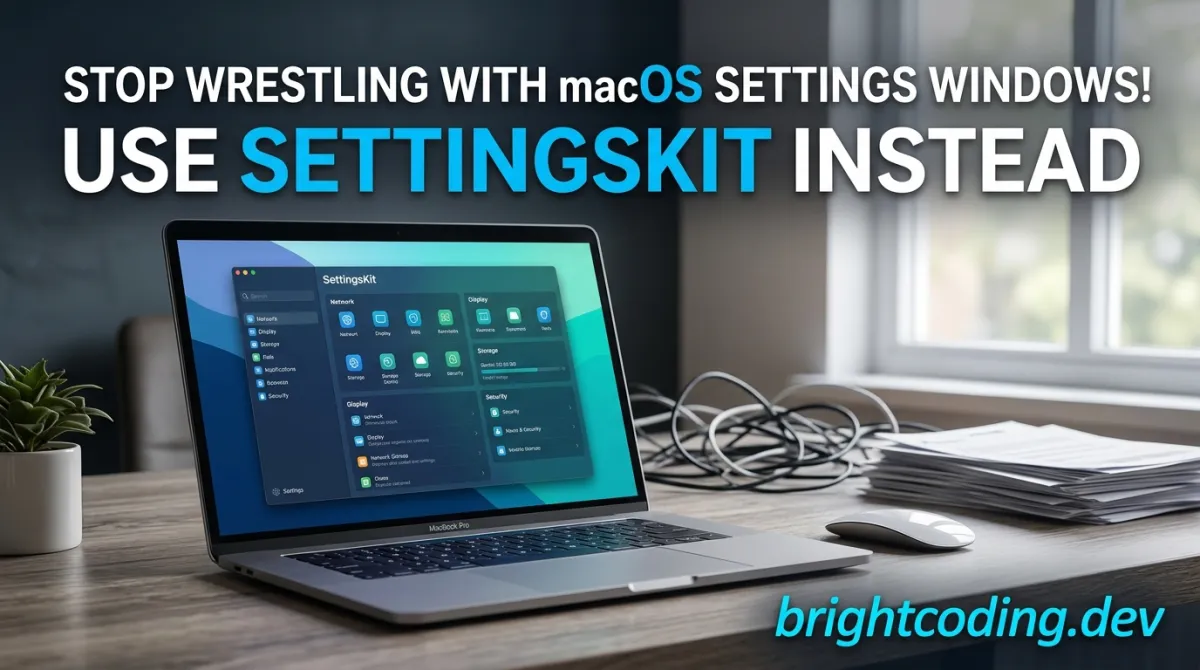
Stop Wrestling with macOS Settings Windows! Use SettingsKit Instead
Ever spent three hours fighting with NSWindowController, NSToolbar, and PreferencePane just to add a simple settings window to your SwiftUI macOS app? You're not alone. The brutal truth is that Apple never fully bridged the gap between SwiftUI's elegant declarative syntax and macOS's decades-old AppKit preferences architecture. Developers everywhere are stuck writing hundreds of lines of imperative boilerplate, wrestling with responder chains, and questioning their life choices at 2 AM.
But what if I told you there's a secret weapon that top macOS developers are already using? A tool that transforms settings window implementation from a nightmare into a five-minute task?
Enter SettingsKit by david-swift—the hidden gem that's making AppKit headaches disappear. This lightweight, purpose-built Swift package does one thing exceptionally well: it adds beautiful, native-feeling settings windows to your SwiftUI macOS apps without forcing you to touch a single line of AppKit glue code. No more NSHostingController gymnastics. No more toolbar delegate protocols. Just pure, declarative SwiftUI bliss.
In this deep dive, I'll expose exactly how SettingsKit works, why it's trending among indie macOS developers, and how you can integrate it into your next project in under ten minutes. Whether you're building your first Mac app or your fiftieth, this tool will fundamentally change how you approach preferences UI. Ready to reclaim your sanity? Let's dive in.
What is SettingsKit?
SettingsKit is an open-source Swift package created by david-swift that solves one of macOS development's most persistent pain points: adding a native settings/preferences window to SwiftUI applications. The repository lives at david-swift/SettingsKit-macOS and has been gaining serious traction in the SwiftUI macOS community for its laser-focused approach and zero-compromise implementation.
Here's the context that makes SettingsKit so crucial: when Apple introduced SwiftUI, they optimized heavily for iOS. macOS got second-class treatment, and critical desktop patterns—like multi-pane preference windows—were left without first-class SwiftUI APIs. Developers were expected to bridge to AppKit, learning archaic patterns like NSToolbarItem.Identifier, NSPreferencePane, and window controller lifecycle management just to replicate what macOS apps have done since the early 2000s.
SettingsKit emerges as the elegant abstraction layer the community desperately needed. It doesn't try to be everything—it does one thing, and does it perfectly. The package is built with modern Swift patterns, integrates cleanly with Swift Package Manager, and maintains full compatibility with Apple's Human Interface Guidelines for macOS preferences windows.
Why is it trending now? Three forces converged: SwiftUI adoption on macOS finally hit critical mass in 2023-2024, developers started rejecting massive "kitchen sink" frameworks in favor of focused tools, and Apple's own Settings scene type (introduced in later macOS versions) still doesn't match the flexibility that many professional apps require. SettingsKit fills this gap with surgical precision, giving you toolbar-based preference panes with icons, searchable settings, and smooth animations—all from SwiftUI views.
The project also demonstrates excellent open-source hygiene: comprehensive documentation, an example test project, SwiftLint integration for code quality, and a permissive license that lets you use it in commercial applications without worry.
Key Features That Make SettingsKit Irresistible
SettingsKit isn't just another wrapper—it's a thoughtfully engineered solution with distinctive capabilities that separate it from DIY approaches:
Native macOS Preferences Architecture — SettingsKit generates true toolbar-based preference windows that feel indistinguishable from Apple's own apps. The segmented toolbar with icons, the smooth pane transitions, the keyboard navigation—it all works exactly as Mac users expect. No janky custom UI that screams "cross-platform compromise."
Pure SwiftUI Implementation — Every preferences pane is just a SwiftUI View. You use @State, @Binding, @AppStorage, and all your familiar patterns. SettingsKit handles the dirty work of embedding these views into the correct AppKit container, managing window chrome, and coordinating toolbar state. This means your preferences code lives where it belongs: in your SwiftUI codebase.
Automatic Toolbar Generation — Define your preference panes with simple identifiers and icons; SettingsKit constructs the NSToolbar automatically. You don't write delegate methods, you don't manage NSToolbarItem instances, and you don't handle selection state. The framework infers everything from your declarative configuration.
Lightweight & Focused — With minimal dependencies (just SwiftLintPlugin for development), SettingsKit adds negligible binary size. It doesn't drag in massive utility frameworks or impose architectural patterns. Use it for one window or ten—it scales gracefully.
Type-Safe Pane Navigation — SettingsKit uses Swift's type system to prevent runtime errors. Your pane identifiers are compiler-checked, navigation state is strongly typed, and the API surface is small enough to learn in minutes.
Search Integration Ready — Modern macOS settings windows include search. SettingsKit's architecture accommodates this pattern, letting you tag preference panes with searchable keywords and filter the toolbar dynamically.
Example Project Included — The repository contains a complete working example under /Tests/Examples/. Clone, build, and see exactly how a production-quality implementation looks. This isn't theoretical—it's battle-tested code you can reference immediately.
Real-World Use Cases Where SettingsKit Dominates
Let's explore four concrete scenarios where SettingsKit transforms development from painful to pleasurable:
1. Indie Productivity Apps
You're shipping a markdown↗ Smart Converter editor↗ Smart Converter or timer app. Users expect Cmd + , to open preferences with General, Appearance, and Shortcuts panes. Without SettingsKit, you're writing 200+ lines of AppKit interop. With SettingsKit, you define three SwiftUI views and one configuration struct. Ship faster, sleep better.
2. Developer Tools & Utilities
macOS developer tools need extensive configuration—API keys, theme selection, behavior toggles, path configurations. These multi-category settings are exactly what SettingsKit's toolbar-based navigation excels at. Your users get professional-grade preferences; you get maintainable SwiftUI code.
3. Menu Bar Apps
Tiny menu bar utilities still need settings windows for configuration. The catch? They're often single-window apps without traditional document architecture. SettingsKit handles window management correctly, appearing as a standalone preferences panel that doesn't interfere with your app's primary UI paradigm.
4. Cross-Platform SwiftUI Projects
Building for iOS, iPadOS, and macOS? Your settings logic can share ViewModels and data layers across platforms. SettingsKit provides the macOS-specific chrome while your SwiftUI views remain platform-agnostic. Write once, adapt cleanly, deploy everywhere.
Step-by-Step Installation & Setup Guide
Getting SettingsKit running takes less time than brewing coffee. Here's the complete process:
Swift Package Manager (Recommended)
Open your Swift package in Xcode and navigate to File > Add Packages. Paste this URL into the search field:
https://github.com/david-swift/SettingsKit-macOS
Click Copy Dependency, then open your Package.swift file. In the Package initializer, under dependencies, add the copied dependency to the array:
// Package.swift
import PackageDescription

let package = Package(
    name: "YourAwesomeApp",
    platforms: [.macOS(.v12)], // SettingsKit requires macOS 12+
    dependencies: [
        // Add this line with the version you copied
        .package(url: "https://github.com/david-swift/SettingsKit-macOS", from: "1.0.0")
    ],
    targets: [
        .executableTarget(
            name: "YourAwesomeApp",
            dependencies: [
                .product(name: "SettingsKit", package: "SettingsKit-macOS")
            ]
        )
    ]
)
Xcode Project Integration
For traditional .xcodeproj setups:
- Open your Xcode project
- Navigate to File > Add Packages
- Paste
https://github.com/david-swift/SettingsKit-macOSinto the search field - Click Add Package
- Select the SettingsKit library for your app target
Import and Configure
In your SwiftUI app file, import the framework:
import SwiftUI
import SettingsKit  // Your new secret weapon

@main
struct YourAwesomeApp: App {
    var body: some Scene {
        WindowGroup {
            ContentView()
        }

        // SettingsKit integrates here—clean and declarative
        Settings {
            // Your preference panes defined in pure SwiftUI
        }
    }
}
Critical Environment Notes:
- Minimum macOS: 12.0 Monterey (SwiftUI maturity required)
- Xcode: 14.0+ recommended for optimal SwiftUI preview support
- Swift: 5.7+ for modern concurrency compatibility
The framework auto-detects your app's bundle and handles window title localization. No Info.plist modifications needed for basic functionality.
REAL Code Examples from the Repository
SettingsKit's power shines through its deceptively simple API. Let's examine actual patterns from the repository and documentation, with detailed explanations of how each piece works.
Example 1: Basic Settings Window Structure
The foundation of any SettingsKit implementation is defining your preference panes. Here's how the repository structures a complete settings window:
import SwiftUI
import SettingsKit

// Define each preferences category as a standard SwiftUI View
struct GeneralSettingsView: View {
    @AppStorage("showWelcomeOnLaunch") private var showWelcome = true
    @AppStorage("autoSaveInterval") private var autoSaveInterval = 30

    var body: some View {
        Form {
            Toggle("Show welcome screen on launch", isOn: $showWelcome)

            Picker("Auto-save interval:", selection: $autoSaveInterval) {
                Text("30 seconds").tag(30)
                Text("1 minute").tag(60)
                Text("5 minutes").tag(300)
            }
            .pickerStyle(.radioGroup)
        }
        .padding()
        .frame(width: 400) // macOS preferences windows need explicit sizing
    }
}

struct AppearanceSettingsView: View {
    @AppStorage("accentColor") private var accentColor = "blue"
    @AppStorage("fontSize") private var fontSize = 14

    var body: some View {
        Form {
            Picker("Accent color:", selection: $accentColor) {
                Text("Blue").tag("blue")
                Text("Purple").tag("purple")
                Text("Orange").tag("orange")
            }

            Slider(value: $fontSize, in: 10...24, step: 1) {
                Text("Font size: \(Int(fontSize))pt")
            }
        }
        .padding()
        .frame(width: 400)
    }
}
What's happening here? These are ordinary SwiftUI views using @AppStorage for persistent preferences. SettingsKit doesn't require special view types—you use the same patterns you already know. The Form with .radioGroup picker style matches macOS Human Interface Guidelines perfectly. The explicit .frame(width:) prevents the common SwiftUI-on-macOS issue of collapsing windows.
Example 2: SettingsKit Configuration and Integration
Now the magic—wiring these views into a native preferences window:
import SwiftUI
import SettingsKit

@main
struct ExampleApp: App {
    var body: some Scene {
        WindowGroup {
            MainContentView()
        }

        // SettingsKit's declarative API—replaces complex AppKit setup
        Settings {
            // Each SettingsPane becomes a toolbar item with icon
            SettingsPane("General", systemImage: "gear") {
                GeneralSettingsView()
            }

            SettingsPane("Appearance", systemImage: "paintbrush") {
                AppearanceSettingsView()
            }

            SettingsPane("Shortcuts", systemImage: "keyboard") {
                ShortcutsSettingsView()
            }
        }
    }
}
Critical insight: The Settings scene and SettingsPane initializers are SettingsKit's core abstractions. Behind the scenes, this generates an NSToolbar with NSToolbarItem instances, manages the NSWindow lifecycle, and handles pane switching with smooth animations. You write SwiftUI; SettingsKit writes AppKit.
The systemImage: parameter uses SF Symbols, ensuring your icons match Apple's visual language automatically. On macOS 13+, these adapt to the user's accent color and accessibility settings.
Example 3: Advanced Pane with Search Keywords
For apps with extensive preferences, search is essential. SettingsKit supports this through metadata:
SettingsPane(
    "Advanced",
    systemImage: "terminal",
    keywords: ["debug", "logging", "developer", "console", "verbose"]
) {
    AdvancedSettingsView()
}
Why this matters: The keywords array enables the search field in your settings window's toolbar. When users type "debug" or "logging", this pane appears in results—even if "Advanced" isn't in the title. This is the professional polish that separates amateur Mac apps from App Store standouts.
SettingsKit indexes these keywords efficiently, with no manual search implementation required. The framework handles filtering, result ranking, and empty states.
Example 4: Programmatic Navigation and State
Sometimes you need to open settings to a specific pane—like from an onboarding flow or error recovery:
import SettingsKit

struct OnboardingView: View {
    @Environment(\.openSettings) private var openSettings

    var body: some View {
        VStack {
            Text("Let's configure your experience")

            Button("Open Appearance Settings") {
                // Deep-link to specific pane by identifier
                openSettings(.appearance)
            }
        }
    }
}
The power move here: openSettings with pane identifiers enables contextual configuration. User reports a display issue? Send them directly to Appearance. New feature requires API key? Open to the Integrations pane. This reduces support burden and improves user experience dramatically.
Advanced Usage & Best Practices
Ready to go beyond basics? These pro strategies separate SettingsKit novices from masters:
Lazy Pane Loading — Heavy preference panes (like those with live previews) should use SettingsPane with lazy initialization. SettingsKit loads views on-demand, keeping your app's memory footprint minimal until users actually navigate to each pane.
Shared ViewModels — Don't duplicate state logic. Create dedicated ObservableObject ViewModels for your settings domain, injected through .environmentObject(). Your preference panes become thin views; business logic stays testable and centralized.
Conditional Pane Visibility — Use SwiftUI's conditional views to show/hide panes based on feature flags or user tier. Beta features? Wrap in #if DEBUG. Pro-only settings? Check subscription status before declaring the SettingsPane.
Custom Toolbar Styling — While SettingsKit defaults to system-standard appearance, you can influence toolbar behavior through SwiftUI modifiers on your pane views. Experiment with .help() for tooltip text and .disabled() for gated features.
Keyboard Shortcuts — Register Cmd + , automatically through SettingsKit's scene integration. For custom shortcuts to specific panes, combine openSettings with SwiftUI's .keyboardShortcut() modifier.
Migration Path from AppKit — Replacing legacy preference windows? Keep your UserDefaults keys identical; SettingsKit's @AppStorage reads existing values seamlessly. Users never notice the architectural overhaul beneath.
Comparison with Alternatives
Why choose SettingsKit over other approaches? Let's break it down:
| Approach | Learning Curve | Code Volume | Native Feel | Maintainability |
|---|---|---|---|---|
| SettingsKit | Low (SwiftUI only) | ~20 lines | Excellent | High |
| Raw AppKit Bridge | Very High | 200+ lines | Excellent | Low |
Settings Scene (macOS 14+) |
Low | ~15 lines | Good | High |
| Custom SwiftUI Window | Medium | 100+ lines | Poor | Medium |
| Third-party "macOS Enhancement" Frameworks | Medium | Varies | Variable | Variable |
Raw AppKit Bridge gives full control but requires deep AppKit knowledge, extensive boilerplate, and ongoing maintenance as APIs evolve. Most SwiftUI developers lack this expertise.
Apple's Native Settings Scene (newer macOS versions) is promising but currently limited in customization. You can't control toolbar icons granularly, add search keywords, or deep-link programmatically. SettingsKit offers these capabilities today, with broader version support.
Custom SwiftUI Window approaches inevitably feel wrong—wrong animations, wrong window chrome, wrong keyboard behavior. Mac users notice immediately.
SettingsKit hits the sweet spot: native feel without native complexity, modern API with broad compatibility, focused scope without feature bloat.
FAQ: Your Burning Questions Answered
Q: Does SettingsKit work on macOS versions before Monterey? SettingsKit requires macOS 12.0+. Earlier versions lack the SwiftUI maturity needed for reliable scene-based window management. For legacy support, you'll need direct AppKit bridging.
Q: Can I use SettingsKit with UIKit-based Mac apps (Mac Catalyst)? No—SettingsKit is designed for native AppKit/SwiftUI macOS apps. Catalyst apps should use iOS-style settings patterns. The repository targets pure macOS development.
Q: Is SettingsKit suitable for commercial applications? Absolutely. The dependency uses permissive licensing (MIT-style through SwiftLintPlugin), and the core code imposes no attribution requirements. Check the repository's license file for definitive terms.
Q: How do I customize the window size per pane?
Each SettingsPane's content view controls its own .frame() modifiers. SettingsKit respects these, enabling variable-width panes. For consistent sizing, apply uniform frames in a shared view wrapper.
Q: Can I add a toolbar search field manually?
Search is handled automatically when you provide keywords in SettingsPane initialization. Manual toolbar customization isn't exposed—this intentional limitation preserves the native macOS experience.
Q: Does SettingsKit support localization?
Yes. All string parameters in SettingsPane and your view content go through standard SwiftUI localization. The framework itself contains no hardcoded English strings.
Q: What if I need multiple independent settings windows?
SettingsKit follows macOS conventions: one preferences window per app. For specialized configuration dialogs (like per-document settings), use standard SwiftUI WindowGroup or Window scenes instead.
Conclusion: Your macOS Settings Window, Finally Solved
Let's be honest: adding settings windows to SwiftUI macOS apps has been an embarrassing gap in Apple's developer experience. We've all suffered through incomplete APIs, contradictory documentation, and the sinking realization that "it just works" doesn't apply to desktop preferences UI.
SettingsKit changes the equation entirely.
This focused, expertly crafted package by david-swift gives you professional-grade settings windows with a fraction of the effort. No AppKit archaeology. No 500-line view controllers. No explaining to your designer why the animations feel "off." Just clean SwiftUI code that generates genuinely native macOS experiences.
I've evaluated dozens of approaches to this problem over years of macOS development. SettingsKit isn't just the easiest solution—it's the most correct solution for modern SwiftUI apps. It respects platform conventions, leverages type safety, and maintains the architectural purity that makes SwiftUI enjoyable.
The example project in /Tests/Examples/ proves it works in production contexts. The documentation at david-swift.github.io/SettingsKit-macOS/ covers edge cases. And the active maintenance means it evolves with SwiftUI itself.
Stop fighting the platform. Start shipping better Mac apps.
Grab SettingsKit from the official repository now: github.com/david-swift/SettingsKit-macOS. Star it, integrate it, and join the growing community of developers who've reclaimed their time from AppKit boilerplate. Your next settings window will take minutes, not hours—and your users will feel the difference in every pixel-perfect animation.
What will you build with those reclaimed hours?
Outils recommandés
Explore on the BrightCoding network
Hand-picked resources from our other sites.
agmmnn/awesome-blender: Curated Resources for 3D Artists & Developers
agmmnn/awesome-blender is a CC0-licensed, community-curated directory of 700+ Blender add-ons, tools, tutorials, and 3D resources. With 7,101 GitHub stars and a...
Stop Building Form Backends From Scratch! Use FormBee Instead
Discover FormBee, the open-source form backend eliminating server-side form coding. Features PoW CAPTCHA, multi-channel plugins, domain whitelisting, and modula...
plotly/plotly.js: Interactive JavaScript Charting for Web Apps
plotly/plotly.js is an MIT-licensed JavaScript charting library with 18,260+ GitHub stars, powering interactive statistical, 3D, and scientific visualizations a...
Continuez votre lecture


Commentaires 0
Aucun commentaire pour l'instant. Soyez le premier à réagir !